Dr. Marcelo Balsamo presents a case report demonstrating direct adhesive post luting and core buildup in one appointment.
The question about whether to use a post or not is essentially one of substance lost. A large amount of substance loss in the clinical crown area is an argument for anchoring and reinforcing the core buildup with a post. For small defects, anchoring the buildup on the surrounding tooth substance is often sufficient.
Post solutions made from different materials (metal, high-strength ceramic, glass, and quartz fiber) are now available.
[userloggedin]
Quartz and glass fiber posts are characterized by tooth-like elasticity modulus and thus limit the risk of root fracture from shear loads.
In the case discussed in this article, the patient presented with considerable substance loss on tooth LL5 (Figures 1-3). The barrel ring preparation necessary for a poured post buildup further weakened the tooth substance. A purely retentive post anchoring, according to the traditional pattern, appeared insufficient due to the anticipated stress to the core. Preference was therefore given here to the direct post buildup in the adhesive technique. Utilization of a system based on the adhesive technique also facilitates a minimally invasive procedure, which preserves tooth substance and benefits the adhesive bond.
For this case, a post build-up system was chosen that provided an adhesive bond, root-posts, cement-post build-up material (Rebilda Post System, Voco).
With this system, the build-up material simultaneously provides post luting, which allows post cementation and core buildup in one step. The system contains posts in three sizes as well as the matching bur and a reamer for pre-drilling (Figure 4).
Case details
After removing the remainder of the old filling (Figure 5), the length of the root canal was determined to establish the drilling depth (Figure 6). Care must be given that approximately 4 mm of root canal filling remains apically to provide an apical seal.
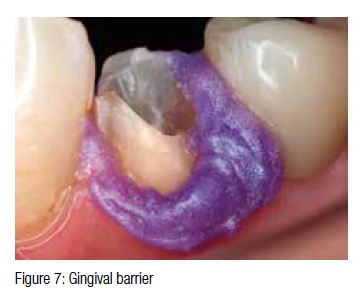
A rubber dam or gingival barrier is used to isolate the tooth during the restoration (Figure 7). The root canal filling material was removed to the determined depth with the bur, and the canal thus concomitantly prepared to the correct diameter (Figure 8). An X-ray was used to verify the fitting accuracy of the post. The post is clearly visible on the X-ray (Figure 9). It was subsequently shortened to the required length with a diamond. Figure 10 shows the canal after preparation but before the bonding step.
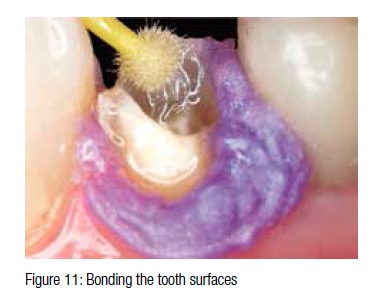
A self-etching, dual-curing bond (Futurabond, Voco) was then applied on the adhesive surfaces around the canal access, but not yet light-cured (Figure 11). This guarantees that the excess material expelled from the canal during insertion of the post also provides a good adhesive bond to the tooth. The employed bond contains a special catalyst and can also be used for self- or dual-curing composites.
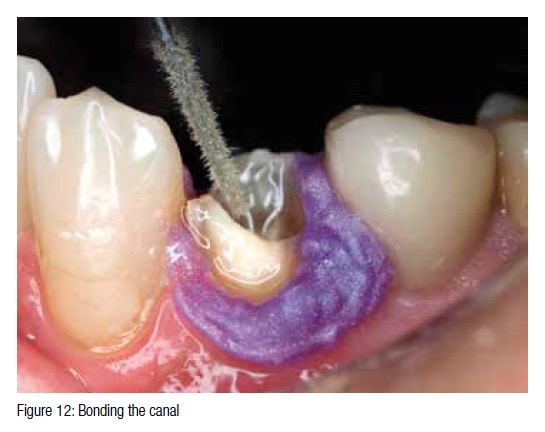
The application of the bond in the root canal (Figure 12) was carried out with an endo-applicator (Endo Tim, Voco). The bond was still not light-cured but thoroughly dried with oil-free air (Figure 13).
After silanising the post (Figure 14), the core build-up material (Rebilda DC®, Voco) was applied directly in the root canal (Figure 15) with an endo-application tip for post luting.
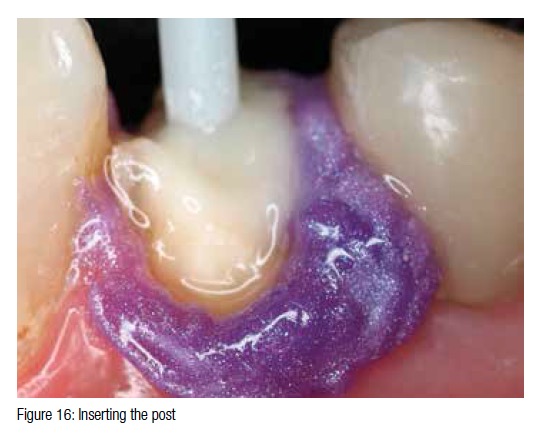
The post was then inserted into the root canal with a light twisting motion immediately after application of the core build-up material (Figure 16). Only now can light-curing be carried out. The post is fixed in the core build-up material with this action (Figure 17). This permits further buildup immediately afterward, without having to wait for the duration of the setting time.
The core was then further constructed around the core with the direct application of Rebilda DC (Figure 18) and light-cured (Figure 19). The core buildup can be further processed immediately afterward
(Figure 20).
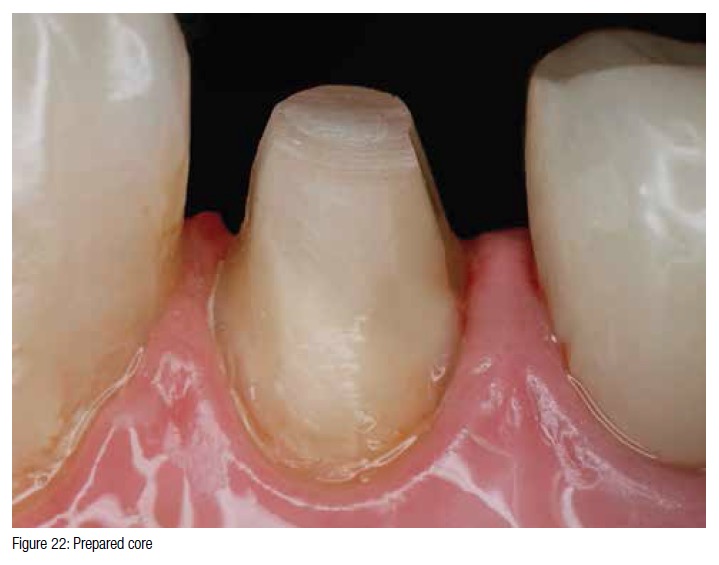
The gingival barrier was removed at this point and the core ground. The core build-up material exhibited a surface hardness comparable to dentin. It can be ground precisely, especially in the areas that change over to dentin (Figure 21). Figure 22 shows the completed crown core.
Click On Images For Figures Below


[/userloggedin]
[userloggedout][/userloggedout]
Stay Relevant With Orthodontic Practice US
Join our email list for CE courses and webinars, articles and mores
