Drs. Larry W. White and Francesca Scilla Smith write about their method of bracket bonding that provides a visible target for the bracket placement that does not rely on guesswork or faulty manipulation of a bracket guide.
Drs. Larry W. White and Francesca Scilla Smith discuss their chosen method of bracket bonding
Introduction
Every orthodontic textbook and countless articles about bracket placement have emphasized the importance of proper bracket positions. Still, there is no complete agreement regarding these locations, and in fact, orthodontists continue to receive recommendations that vary widely regarding this topic.1-4 The most favored technique of bracket placement remains direct bonding performed by the clinician at the chair. This presents several problems — for instance, correctly measuring and positioning of the brackets, maintaining a dry environment, controlling patient cooperation during the procedure plus the considerable amount of personal time doctors must devote to the task.
To obviate these problems and make the bonding appointment a faster, more comfortable, and pleasant experience for patients, doctors began to develop various indirect bonding procedures that offered more bracket placement accuracy and required less doctor chair time.5-11
Even so, many of the advantages offered by the indirect technique remain unattractive for a majority of orthodontic clinicians because of the expense, the necessity of taking and pouring of impressions or having models printed from digital intraoral scans, and the uncertainty of bracket adhesion to the enamel.
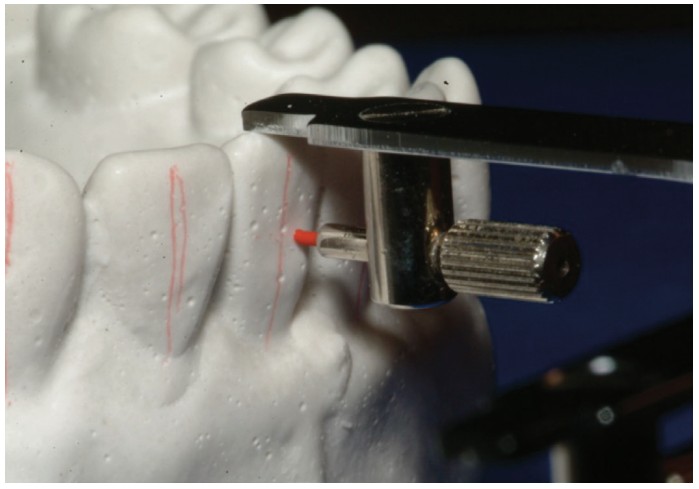
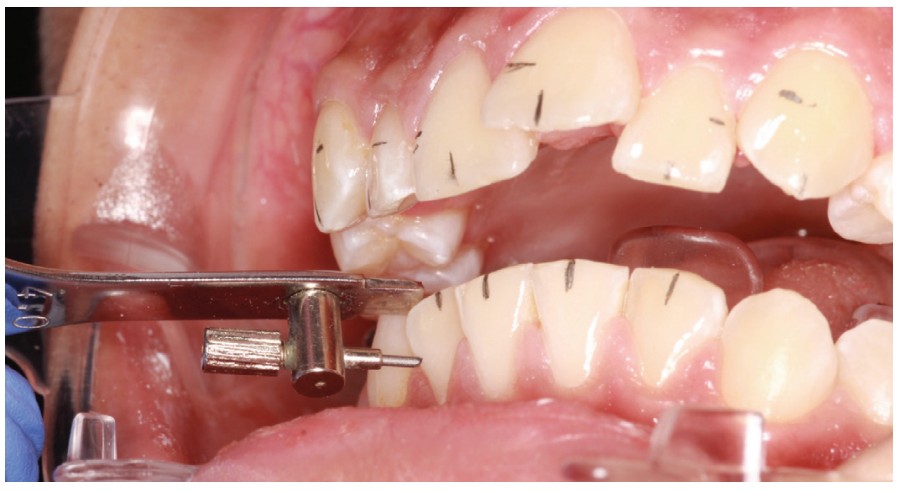
After 53 years of accepting hundreds of orthodontic transfer patients, the problems the senior author has with bracket placement accuracy is not unique. It is a ubiquitous obstacle to achieving acceptable treatment outcomes. The offered technique via this article seeks to overcome the lack of accuracy so often found with direct bracket placement by using an instrument that was developed to simplify and ensure precision with the indirect bonding technique — the Boone Bracket Gauge and Marking Instrument first developed by the Ormco Co. and since imitated by various companies (DynaFlex Orthodontic Laboratory; St. Louis, Missouri) (Figure 1).

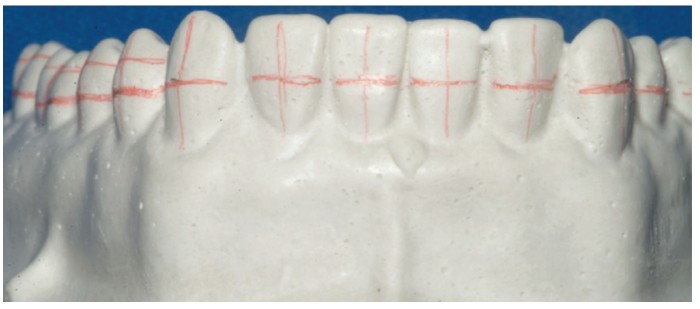
The Boone Bracket Gauge and Marking Instrument was used to mark the plaster cast with a vertical position for the bracket as seen in Figures 2 and 3.
Clinicians can use the same modified Boone Bracket Gauge with the lead stylus for a direct bonding technique that will compare favorably with the accuracy of the indirect approach and also provide economy, certainty, and confidence.
The direct-indirect bracket bonding protocol
We typically start patient therapies with partially bonded appliances — e.g., maxillary and mandibular 2 x 4 or 2 x 6 appliances (molars and incisors and in extraction patients, we add canine brackets) in order to take advantage of the differential moments plus other advantages those arrangements offer as suggested by Mulligan.12 We ordinarily use molar bands, so, I will illustrate only the anterior bracket protocol for its clarity and ease of use in its application.
The direct-indirect method of anterior bracket bonding protocol
Bands are fitted and cemented before bonding the anterior teeth. The teeth to receive brackets are adjusted with an air turbine diamond tip or carbide bur to alter any chips or atypical features the teeth may have. Clean the teeth to be bonded with unflavored pumice, and then follow these steps:
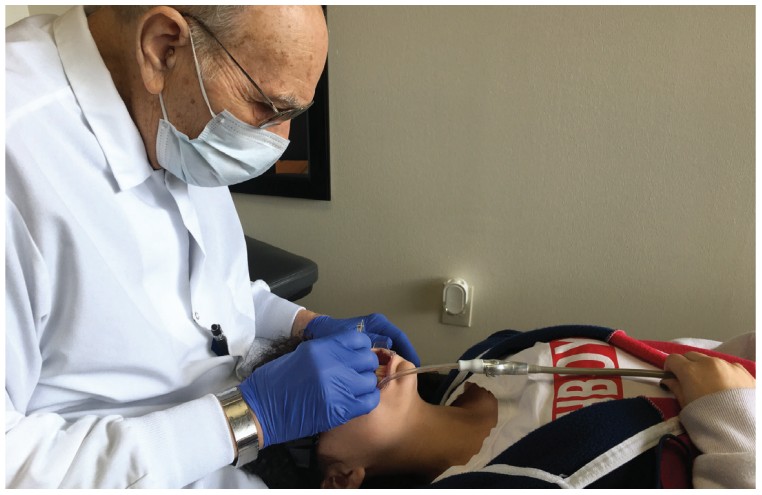
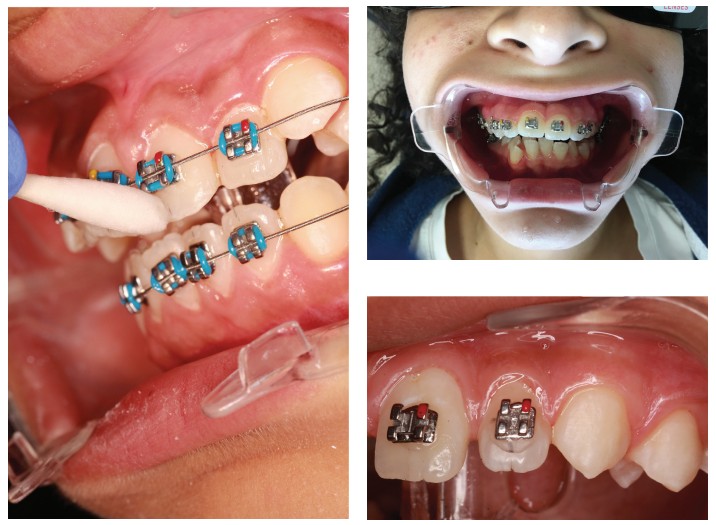
- Incline the patient to a near horizontal position so that the doctor’s and assistant’s vision is almost at 90° to the enamel facial surface (Figure 4).
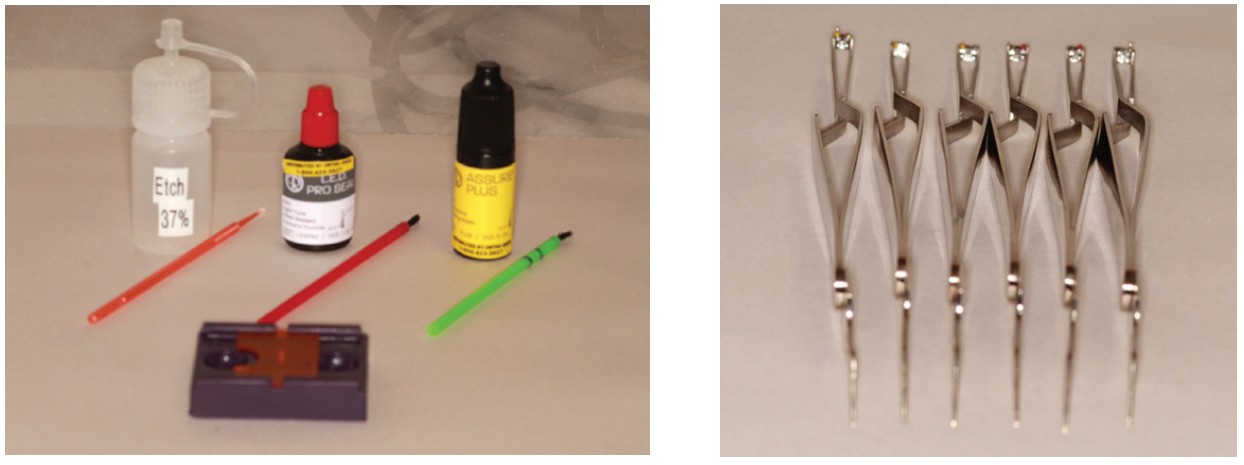
- Prepare the materials used in the bonding procedure — e.g. etch, sealants, activators, composite on brackets, etc. (Figure 5).
- Retract the cheeks with a preferred retractor.
- Etch the entire facial surfaces with 37% H3PO4 for 15-20 seconds.
- Rinse with water, and dry the teeth with an air syringe.
- Use a soft brush to gently apply Pro Seal® (Reliance Orthodontic Products; Itasca, Illinois), then wipe the brush dry on your glove and lightly brush the Pro Seal again to thin the layer and light-cure for 5-10 seconds.
- Use a brush to gently apply Assure® Plus (Reliance Orthodontic Products) to the Pro Seal layer, wipe the brush on your glove, and again lightly brush the Assure Plus to thin the layer and light-cure the combined coatings on each tooth for 10 seconds.
- The dual light-curing will prevent the composite-loaded brackets from sliding.
- When the combined enamel coatings are cured, a 0.5 mm pencil lead will easily mark the center of each crown (Figure 6).
- Use a Boone Combo Gauge and Marking Instrument (DynaFlex Orthodontic Laboratory) to mark the bracket slot position on the lateral side of each crown (Figures 7 and 8); these marks easily erase with an alcohol-saturated cotton tip (Figure 9).
- Use the pencil marks to guide the placement of the brackets (Figure 10).
- Complete the direct-indirect bonding with the pencil marks erased and prepare for wire placements (Figure 11).

Conclusion
This merging of techniques offers several advantages in that it gives clinicians a visible target for the placement of brackets and no longer relies on guesswork or faulty manipulation of a bracket guide. Still, there are a few caveats about it. The first results when the excess bracket composite is not totally removed and covers a pencil mark as seen in Figure 11. Entrapment of pencil marks can also occur if the Pro Seal and/or Assure Plus is not completely light-cured before marking with the pencil. Clinicians can easily remove those defects with an air turbine polishing bur, but attention to technique can avoid this problem. A second will occur if clinicians allow ill-trained personnel to mark the teeth. This feature is the most important and requires maximum expertise and care. One other feature that clinicians should note is not to be discouraged. A learning curve with new techniques always occurs, but the importance of exact bracket placement should motivate the orthodontist to master any system that offers improvement, economy, and patient comfort.
Read about LightForce Orthodontics method of bracket bonding that results from their customized digital braces system at https://orthopracticeus.com/lightforce-orthodontics/
 Larry W. White, DDS, MSD, FACD, is a graduate of Baylor Dental College and Baylor Orthodontic Program and now has an orthodontic practice in Dallas, Texas.
 Francesca Scilla Smith, DDS, MS, was born and raised in Arezzo, Italy. She graduated summa cum laude at the University of Florence Dental School and obtained her orthodontic degree from Nova Southeastern University College of Dental Medicine in Fort Lauderdale, Florida, with a master thesis on conventional and digitally driven indirect bonding. Dr. Scilla Smith practices orthodontics in Dallas, Texas.
- Alexander RG. The Alexander Discipline. Ormco Co (ed). Ormco Co; 1986.
- Andrews LF. Straight Wire, the Concept and Appliance.A. Wells Company; 1989.
- Damon DH. Treatment of the Face with Biocompatible Orthodontics. In: Graber TM, Vanarsdall RL, Vig KWL. Orthodontics, Current Principles & Techniques. 10th ed. Elsevier Mosby; 2005.
- Pitts TR. Begin with the end in mind: Bracket placement and early elastics protocol for smile arc protection. Clinical Impressions. 2009;17(1):1-11.
- Thomas R. Indirect bonding: simplicity in action. J Clin Orthod. 1979;13(2):93-106.
- Hickham JH. Predictable indirect bonding. J Clin Orthod. 1993;27(4):215-217.
- Kalange JT. Ideal appliance placement with APC brackets and indirect bonding. J Clin Orthod. 1999;33(9):516-526.
- White LW. A new and improved indirect bonding technique. J Clin Orthod. 1999;33(1): 17-23.
- White LW. An expedited indirect bonding technique. J Clin Orthod. 2001;35(1):36-41.
- Kalange JT. Prescription-Based Precision Full Arch Indirect Bonding. Seminars in Orthodontics. 2007;13(1):19-42.
- White LW. Creating confidence and certainty with indirect bonding. World J Orthod. 2009;10(2):17-22.
- Mulligan TF. Common Sense Mechanics in Everyday Orthodontics. 2nd ed. CSM Publishing; 1998.
Stay Relevant With Orthodontic Practice US
Join our email list for CE courses and webinars, articles and mores
