Dr. John Wise discusses technologies to create aligners “in your office” (IYO)
Clear aligner treatment has become a staple of our orthodontic armamentarium. It’s common for our patients to ask for “Invisalign®” by name — masterful job at brand awareness. As the “Kleenex®” (facial tissue) of clear aligners, when our clients ask for “Invisalign,” they usually are really asking us about “clear aligners.” In addition, a new trend toward self-treatment with clear aligners has the potential to challenge our specialty. What is the orthodontic practice of tomorrow going to do to survive in a world where do it yourself (DIY) tooth alignment is common place? Will orthodontic practices be changed forever?
Orthodontic care may one day be offered at a mall kiosk outfitted with a DIY intraoral scanner and CBCT machine. Already, the impression, arguably the most difficult procedure to perform with consistency, has been simplified to the point that virtually anyone can make a digital 3D model of his/her teeth. And the companies that want to leapfrog over the orthodontist are investing heavily in these devices. They own the gizmos that may someday put us all out of business. You protest and say, “What about quality photos of the malocclusion to assist in aligning teeth?” Can you say “selfie”? These obstacles are fading fast. Soon our sacred orthodontic records that allow us to diagnose, treatment plan, and then treat a case will all be within reach of the DIY crowd. Every orthodontist reading this article needs to become proficient at creating aligners “in your office” (IYO) to move teeth in a manner befitting our specialty and taking into consideration the new needs of the patients.
IYO lab costs
Your cost to perform IYO clear aligner care is dramatically less expensive than the various third-party companies. And there is a wide array of cases out there begging for treatment — from the 1-2 aligners when the college kid is home on break to the 20-plus aligner cases for those folks who want things clear and clear only. All of the things you do today for a third-party clear aligner case related to chair time, digital intraoral scans, and records is the same as it is for the IYO model. The design, production, and sequencing of the aligners themselves are dramatically different. Doing clear aligners IYO is within reach, and in my opinion, we can do it better, faster, and less expensively than any third-party provider out there. Here is a typical cost breakdown for IYO clear aligner cases:
5 aligners upper and lower
(8-10 using a third party)
Software usage (suresmile®) $45
Technology Coordinator time
(2 hours) $40
Model printing ($15/model) $150
Aligner fabrication time $25
Aligner material $15
TOTAL $275
10 aligners upper and lower (equivalent in my office to 15-20 aligners using a third party)
Software usage (suresmile) $45
TechC time (2.5 hours) $50
Model printing ($15/model) $300
Aligner fabrication time $40
Aligner material $25
TOTAL $460
20 aligners upper and lower
(30-40 using a third party)
Software usage (suresmile) $45
TechC time (3 hours) $60
Model printing ($15/model) $600
Aligner fabrication time $60
Aligner material $50
TOTAL $815
Outsourcing has come full circle
Thomas Friedman’s book The World is Flat delves in great detail into the benefits of outsourcing. That was in 2005. And in the days when computer hardware, software, 3D printing, and digital storage was out of reach financially and technically, outsourcing of digital orthodontic cases made perfect sense. But today we have the capability — all on a laptop computer that can be purchased at Best Buy and 3D printer than can be purchased from Amazon and data storage that can go on a thumb drive — to design and create our own clear aligners for far less money, more control of the process, and, most importantly, with greater precision and improved outcomes. Results are just better when you run the show. The orthodontic delivery system is dramatically improved when you, the orthodontist, have the tools and the know-how to use them. Outsourcing has been turned on its ear. These issues are now better handled in your office (IYO), not in a Central American country, India, or China.
Those troublesome attachments
Why do we need attachments to move a tooth with clear aligners? Attachments, in my opinion, have limited usefulness in a clear aligner case. While extremely helpful to improve the retention of an aligner, the limitations imposed by the periodontal ligament (PDL) make attachments to torque, tip, or bodily move a tooth useless in most cases. We need and want attachments, but be frugal with your attachments. Remove them when the aligners aren’t tracking. You’ll like not having them around. As any trained orthodontist knows, complex movements are best handled with brackets and wires. A compliant patient is your most valuable tool for success with clear aligners.
Do not rely on an attachment to change the fundamental laws of the universe described by Sir Isaac Newton in the 17th century. “An object in motion will stay in motion unless it is acted upon by another object,” or “For every action, there is an equal and opposite reaction.” The PDL, bone, gums, and occlusal forces are all fighting against us, and a little blob of composite can’t change that.
You and your team can do this!
 Once you like your aligner sequence and attachment design, it’s time to build your STL files. You do this on the software with a few pushes of the buttons. They’ve made it so easy. Whatever you can display on the screen can be printed out. You or your technician will design each and every STL file for the case. It doesn’t take long to do. As you design it, save it for printing. Some types of software do this for you. suresmile has the option to create an entire sequence of STL files, which dramatically saves time (but comes with a cost). You and your TechC should be making clinical notes along the way to assist you clinically once the aligners are delivered. Anyone who can save and name a photo to his/her computer can save and name an STL file to a laptop.
When you have all of your STL files saved to a folder, you can access the 3D printer in your lab, or down the street at an imaging center, or across the country or the world at a printing lab. There are many resources for printing your models. Make sure you order models of an appropriate strength for multiple aligner fabrications since that’s one of the major reasons to do IYO aligners. A model costs anywhere from $10-$20 per arch to be printed. This is currently the most expensive part of this process. Don’t worry. The price is coming down!
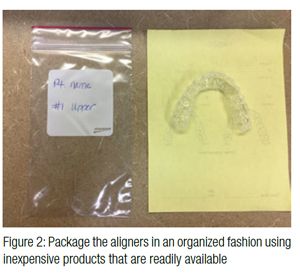
 When your models arrive, make sure you catalog them extremely well, so they can be easily accessed for aligner fabrication. You already have someone working for you who is expert at doing this. Any modifications to be made to the models are done now. If you have a tooth that needs some special torque or rotational help, some simple model carving will do the trick. A shallow trough (approximately 0.5 mm deep) placed where you need it works great. We make our aligners in batches of four or eight depending on the case. No need to make them all at once unless you just like storing stuff. Find some super cool packaging — preferably with your branding on it — and set the aligners aside to make them ready for delivery to the patient.
How long to wear each aligner?
No one knows exactly how long a person should wear an aligner to achieve maximum results. Is it 1 week, 2 weeks, or 10 days? The point is not to choose the exact perfect amount of time; instead, you should choose the time that works best in your system. Eliminate confusion in your clinic and with your patients by sticking with the same amount for each aligner. We have chosen 2 weeks per aligner for our routine. Some offices will make two aligners from each 3D printed model. In this way, the patient has a “fresh” aligner to wear for each sequence. As we all know, any plastic material will deform over time, and having a fresh aligner will eliminate this issue. So a case with ten 3D printed models will have 20 aligners. You may choose to shorten the wear time in this scenario to 1 week
per aligner.
The decision for the amount of time to wear the aligners can be affected by how much movement you are trying to achieve with each one. So, your virtual movements and STL file/model creation should coincide with your time interval. In the IYO aligner world, being economical with the number of aligners will help your bottom line. The more models/aligners you make, the more costs for you.
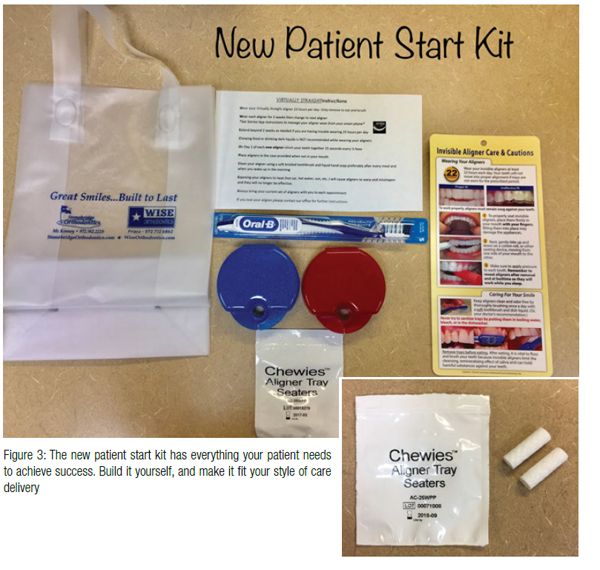
At the first delivery appointment, you’ll need to set aside enough time to affix any attachments you designed along with instructions to the patient. We find it helpful to have printed instructions for the patients to look over while they are there waiting for the doctor to arrive. All of the clinical time up to your arrival has been with your staff. Doctor time at the first aligner delivery appointment is generally less than 5 minutes. An important part of your role is to direct your laboratory technician on how to prepare the next set of aligners. You should have a simple form available at the chair for this purpose, just like any other lab appliance you make. Your lab tech needs your instructions to be clear and concise. How many aligners? Any special trimming? Model modifications? Delivery date?
The second and all subsequent aligner delivery appointments are even simpler than the first. Your clinical assistant will seat the patient and get a brief update on how the last few weeks have gone. A few probing questions will do the trick. Choose a good listener for this job. How are the aligners fitting? What sort of routine have you established to wear your aligners? What aligner are you on right now? Any special issues we need to address with your aligners? There should be floss, aligner trimming scissors, mouth mirror, scaler/explorer, the new set of aligners, and a carryout bag right there at the chair. Teach your clinical team to look at the current aligner in the mouth to discover areas that are not tracking, impingement on gingiva, and any other issues related to a properly fitting aligner. Your assistant should take the current aligner to have it cleaned, and then floss the teeth — not to clean them but to ascertain which contacts are tight, light, or open. He/she should document the contacts for you.
At this point, if all lights are green, your clinical assistant can open up the next aligner set and deliver them to the patient. If not, no worries; staying in the current aligner for a few more days is not a big deal. The assistant should call you to the chair in either scenario at this point to:
- Congratulate the patient on a successful aligner sequence experience, or give specific directions to complete the current aligner sequence before moving on to the next.
- Perform any necessary IPR (which was determined at the last visit and even before that with your clinical notes made during your software work).
- Direct your lab tech for the next aligner sequence construction.
Midcourse corrections/refinements
As the master of your own fate with clear aligner design and fabrication, you have total control over any adjustments you want to make mid-treatment or toward the end of the aligner sequence. For longer cases, you can choose to print only a portion of the 3D models, monitor the case for tracking, and then adjust on the fly. Print a few more models and continue. At the end of the aligner sequence, if you need more movement, you can use the original scan to accomplish some changes. Other times, you’ll need an updated digital scan to reboot the case. But no worries; the lab cost to you is still very reasonable, and as I said before, you have control over the case. If you know you have a complex case upfront, plan for it and charge accordingly.
The finish line
 As any specialist knows, starting an orthodontic case is easy; the finishing is difficult. With aligners, just like with braces, those small, fine movements we need to really put the finishing touches on the case are tricky. Make sure that you and your patients are realistic about what an aligner can accomplish. Make sure your patients’ goals align with your goals. At the final delivery of aligners, make an assessment as to the need for refinement aligners. You’ll also want to decide if you will need another intraoral scan. In my practice, we do this about 10% of the time. The other 90% of aligner cases finish up the way we planned them from the beginning.
We ask our patients to wear their final aligner for some additional time. That’s the one with all of the last detailing. If that one fits well, you’ve succeeded. Ask them to wear it full time an additional 4, 6, or even 8 weeks. Then when patients come in for their final check, have a new aligner/retainer ready for them. This appliance will have been made from the same exact 3D-printed model that you made their final aligner from. The only difference is the material. This last aligner/retainer is made from a stiffer material that will last for many years.
In our practice, we use the Essix ACE® material for the aligners and the Essix® Plus™ material for the retainer. At this point, you can continue to ask the patient to wear the Essix Plus aligner for 24 hours, or you can start to cut back the time. Since many of our patients in the clear aligner care cycle are adults, we entrust them to make decisions about wear. They can titrate their wear time all the way down to sleeping hours only. In every case, our patients find the right amount of time to wear their retainer to hold their teeth straight. They love these “slip cover” retainers — no wires showing and no bulky palatal plastic. The Essix Plus material is very durable and will last for many years in most cases.
The chair time bonus
One of the really cool things about clear aligner care is the fact that these patients are really tuned into wearing the aligners, so retainer wear is super easy for them. We find there is virtually no benefit to calling them back in for “retainer check” appointments for 2-plus years, which is our standard for teenagers and standard braces cases. Instead of four or five retainer checks, we have one or two. You can add one more item to the list of why IYO clear aligner treatment is a must for the modern specialist practice.
Technology has arrived
The technological advances of just the past few years have dramatically changed our world. In the orthodontic world we all live in, that means that 3D treatment planning, robotic wire bending, aligner manufacture, and 3D printing and imaging are all easily within our reach. Just like with braces, the more control you have as the orthodontic specialist, the better. Let’s leave the third-party aligner companies for our general dentist friends who need the oversite and guidance for success. As specialists, we can be the experts in clear aligner design, manufacture, and treatment. And as we move forward with the rapidly changing technology, orthodontic specialists will be competing very effectively with the myriad third-party companies who are trying to win the “race to the bottom” on lab support. Our patients’ smiles are important; they have every reason in the world to choose a specialist for their care. Let’s help them make the right choice by providing clear aligner treatment IYO, not DIY!
Stay Relevant With Orthodontic Practice US
Join our email list for CE courses and webinars, articles and mores
